WITCHES: BTS

Making Of / 12 January 2019

June 2018

Somehow I managed to capture a series of clips of my daughter and her friends playing the week before summer started. On the spot, they came up with this elaborate education for me about what it means to be a witch and how to train. It was so much fun and they kept asking if I was going to make a movie about them. So I did.


I used DaVinci to grade and edit everything, its such a beast of a program. Using the keying system, I also produced a bunch of garbage mattes for the kids (in addition to traditional rotoscoping).


After I got the footage edited with a story in mind,  I thought it would be fun to track everything in Blender and turn it into a VFX exercise. 


After I tracked the footage, some characters from Mixamo were placed with grass particles in Blender.

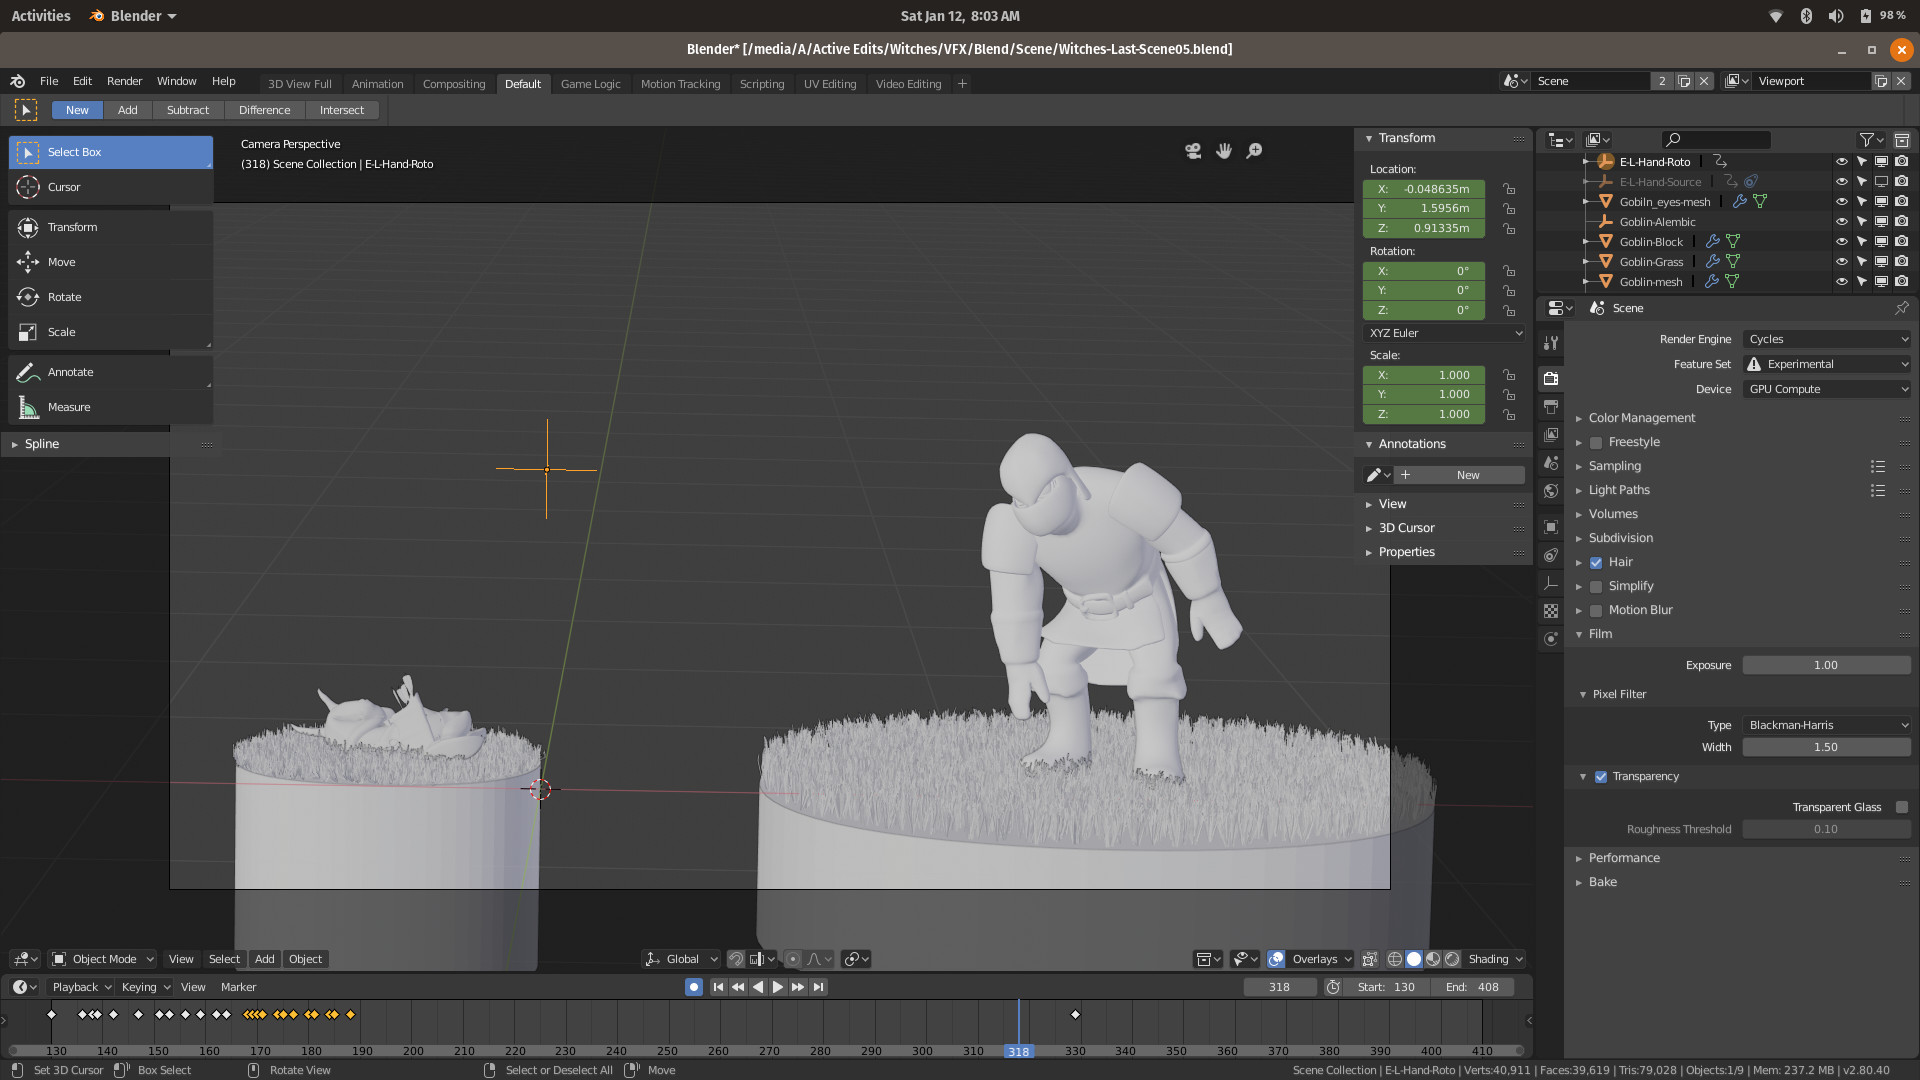
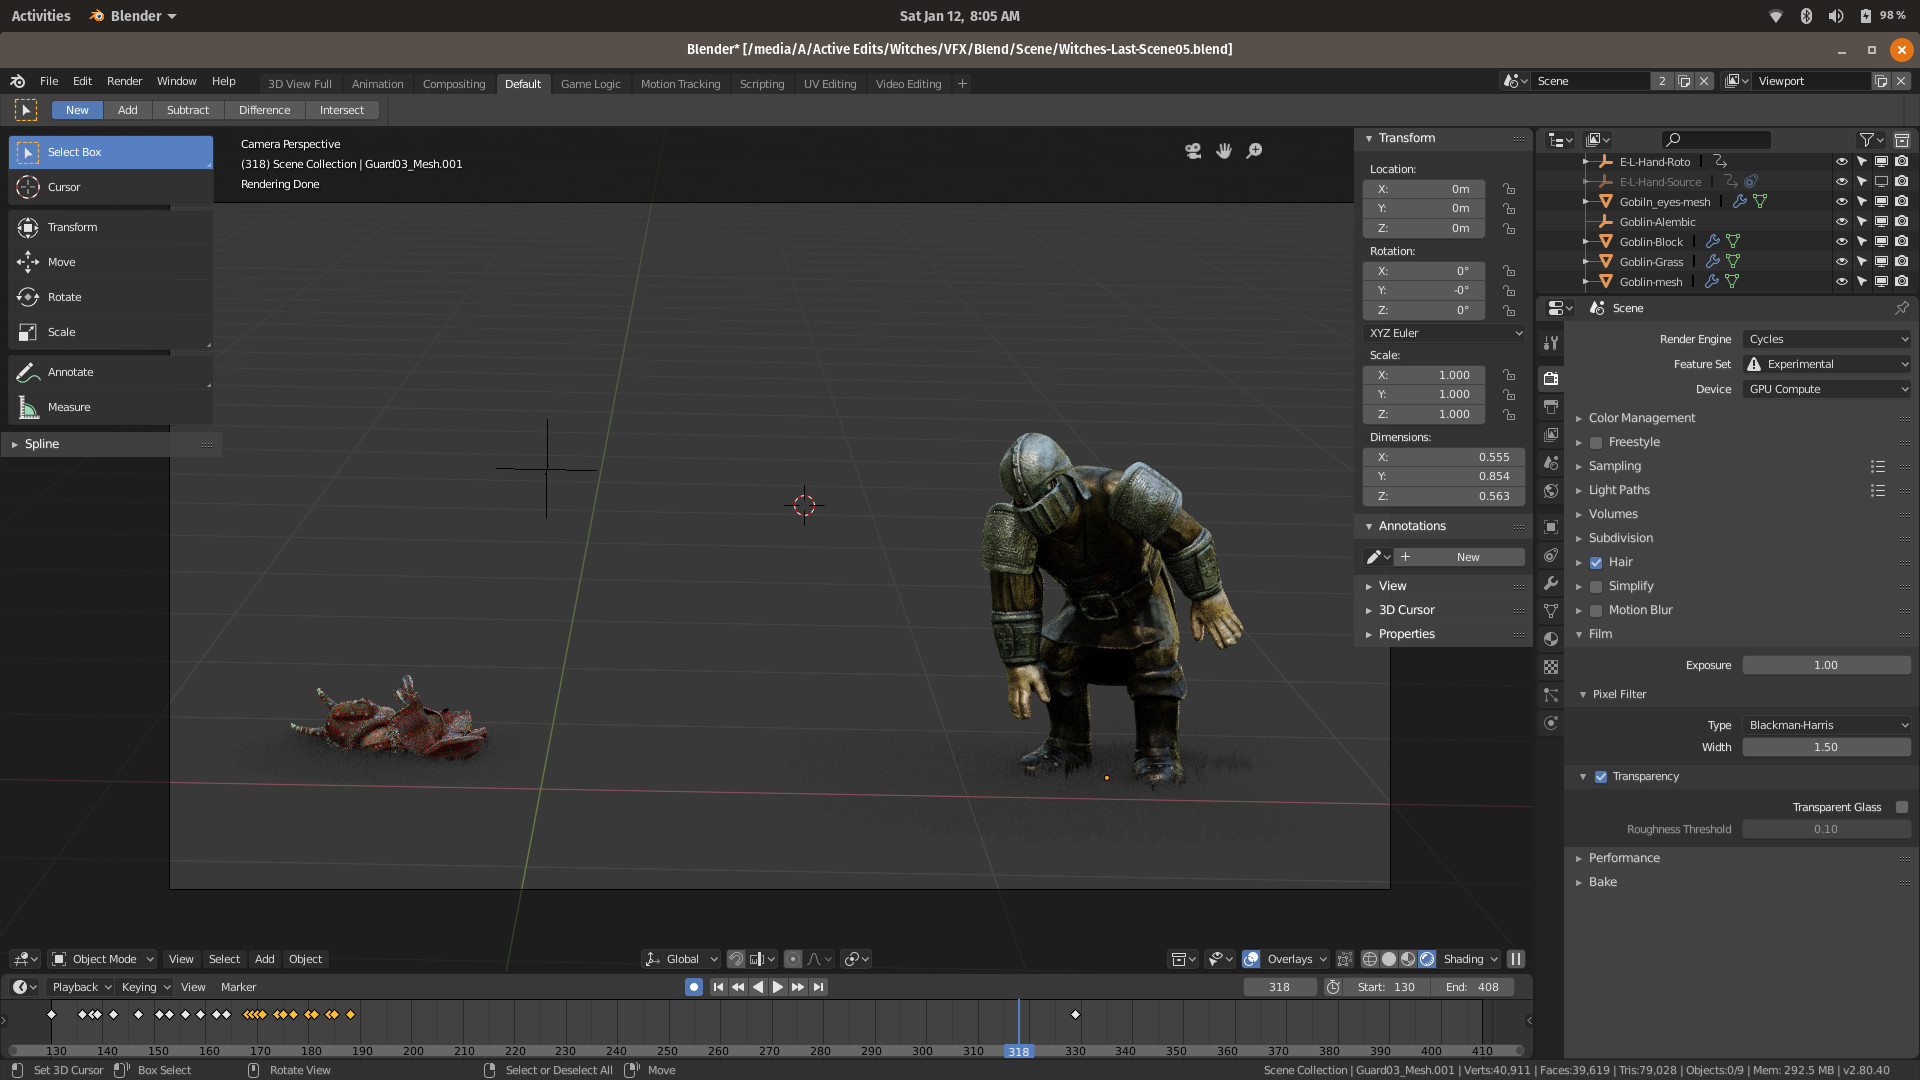
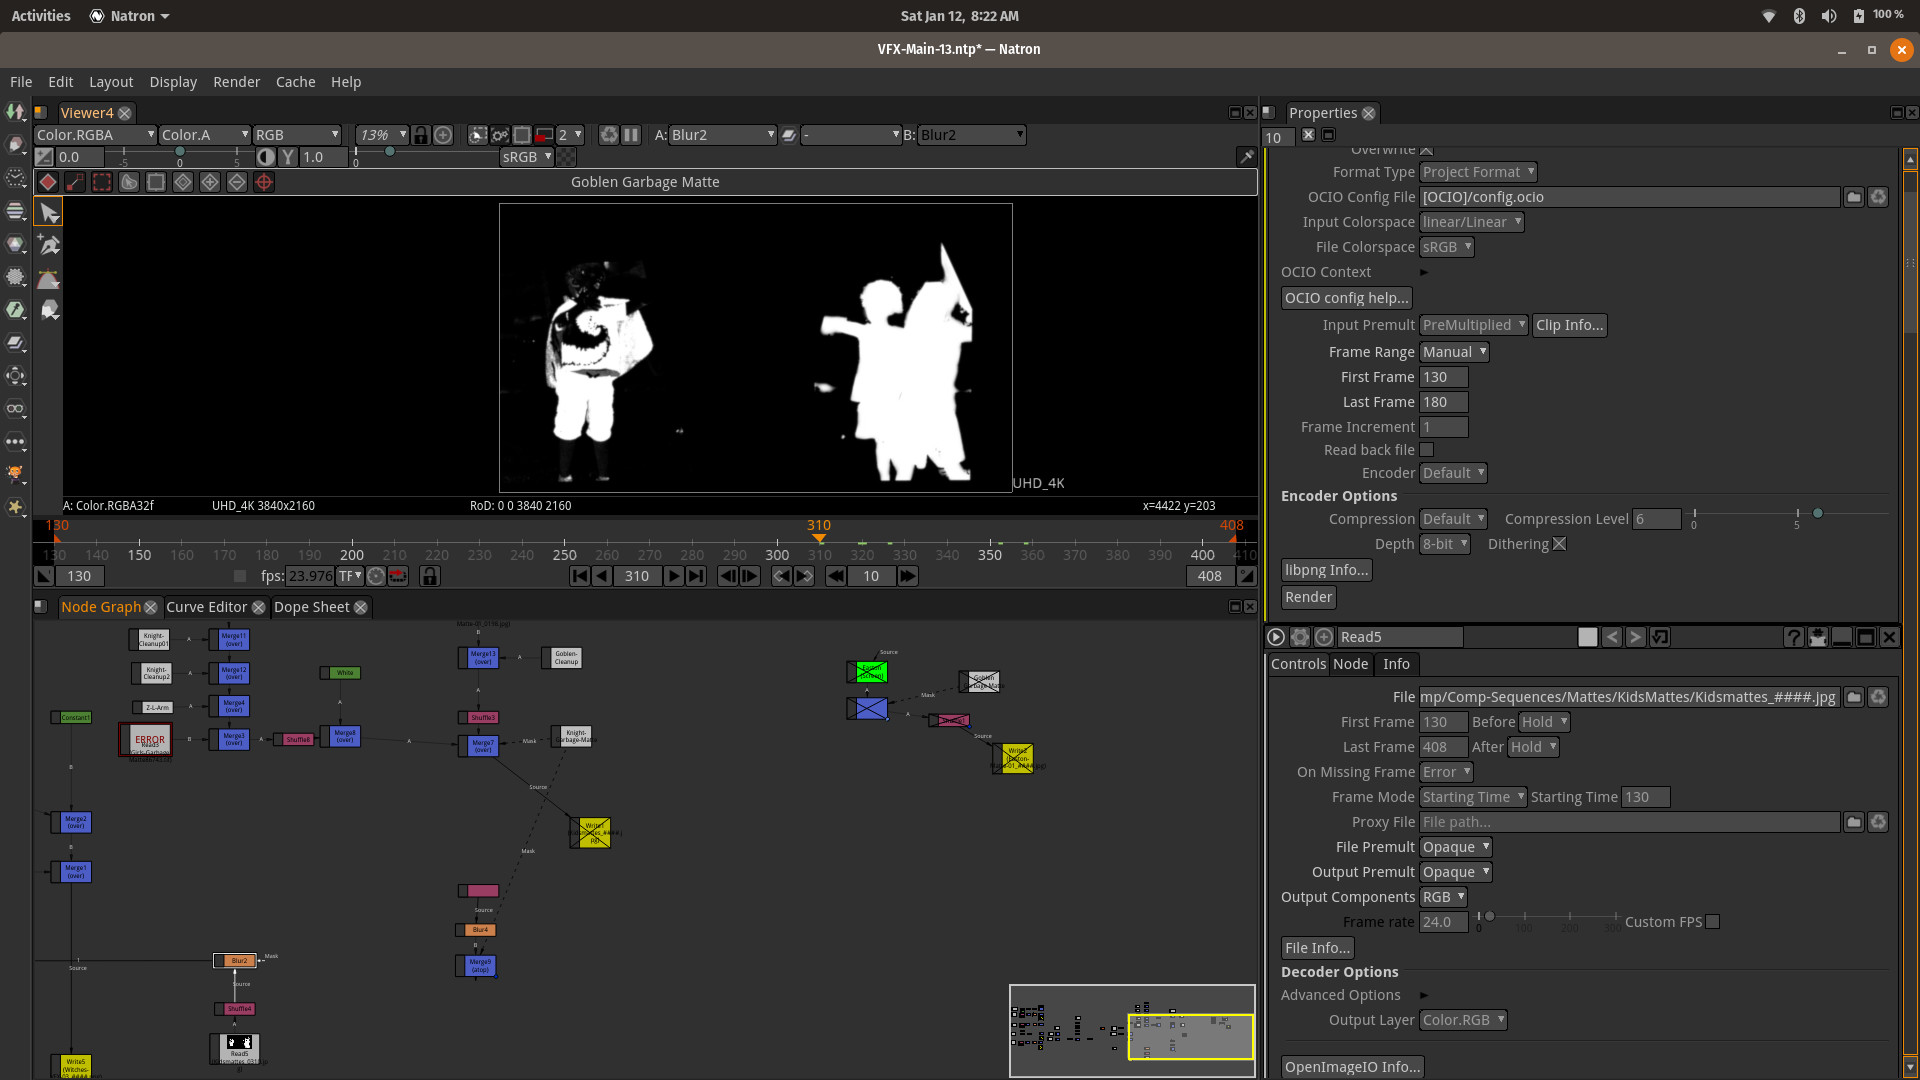
I brought the Renders and some garbage mattes (generated from the grass in the plate) into Natron. 


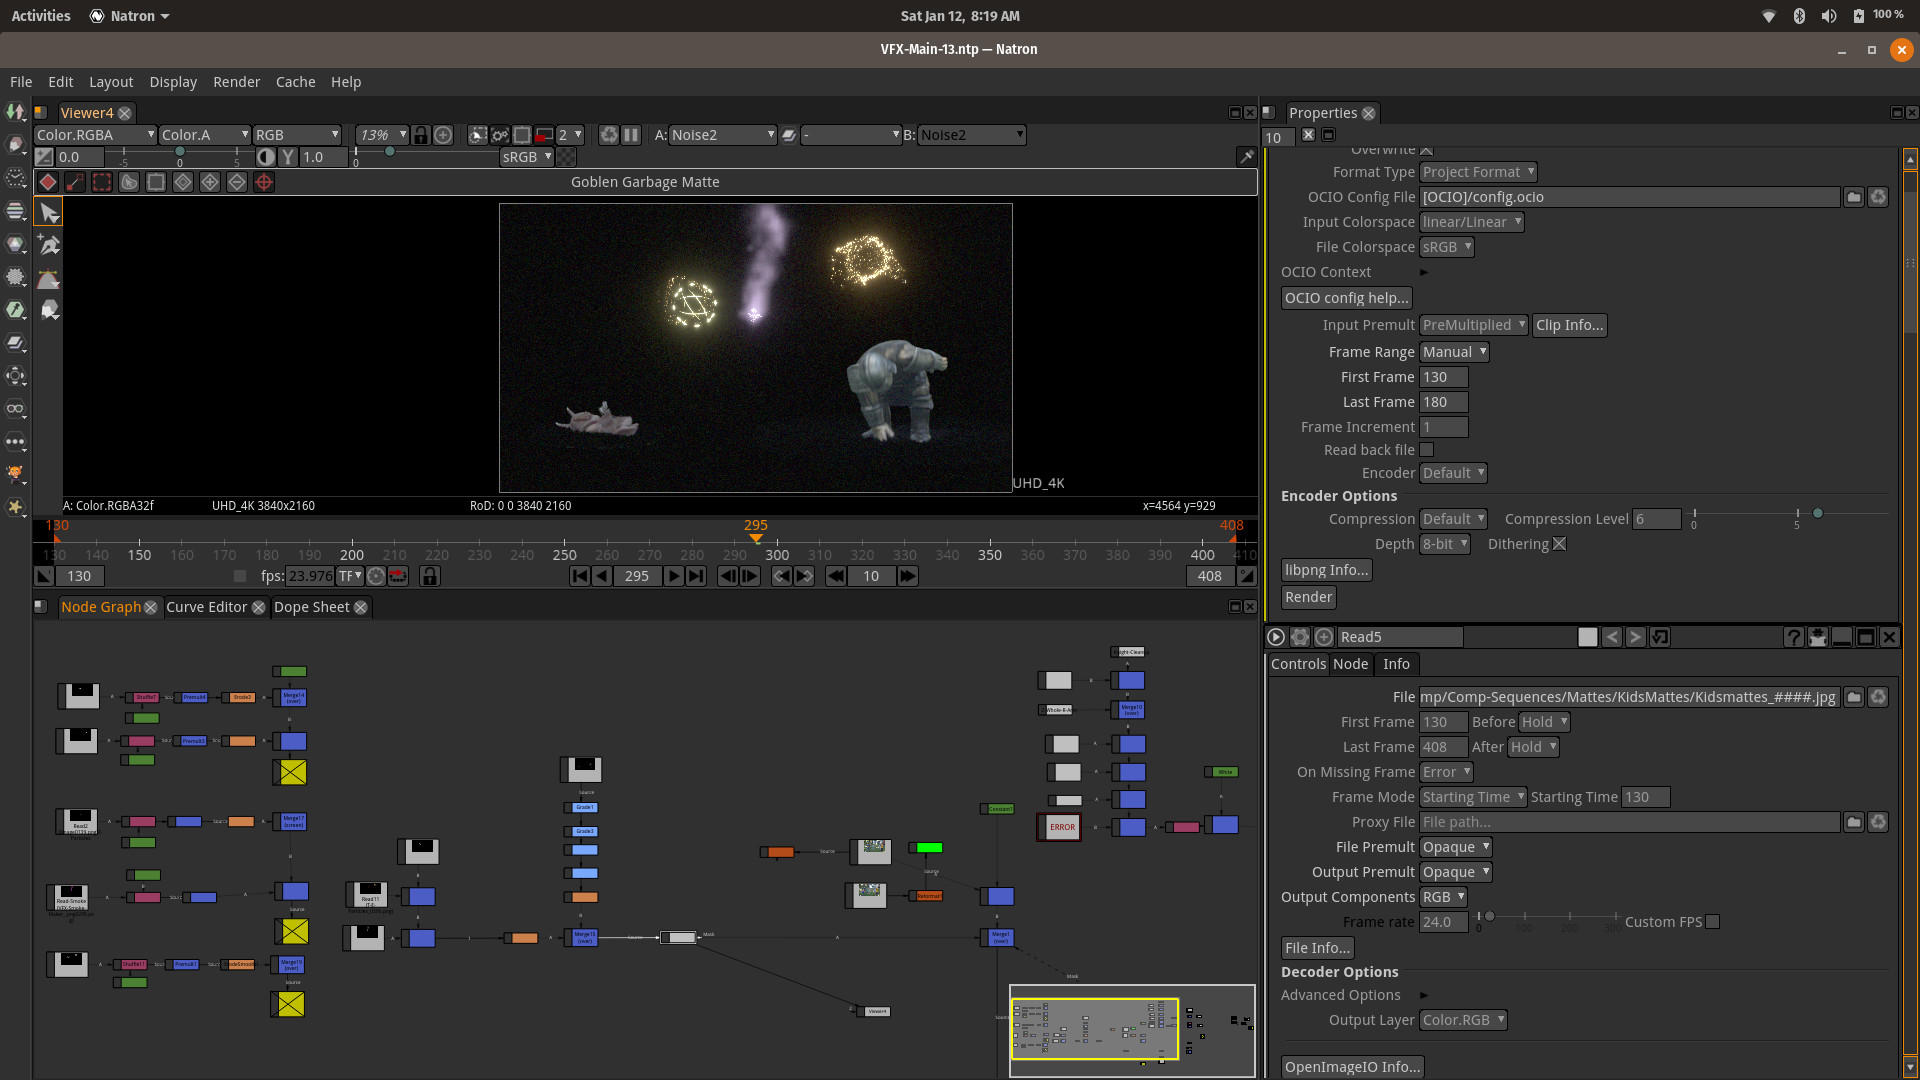
With these pieces, I managed to add some glows, grain, etc.


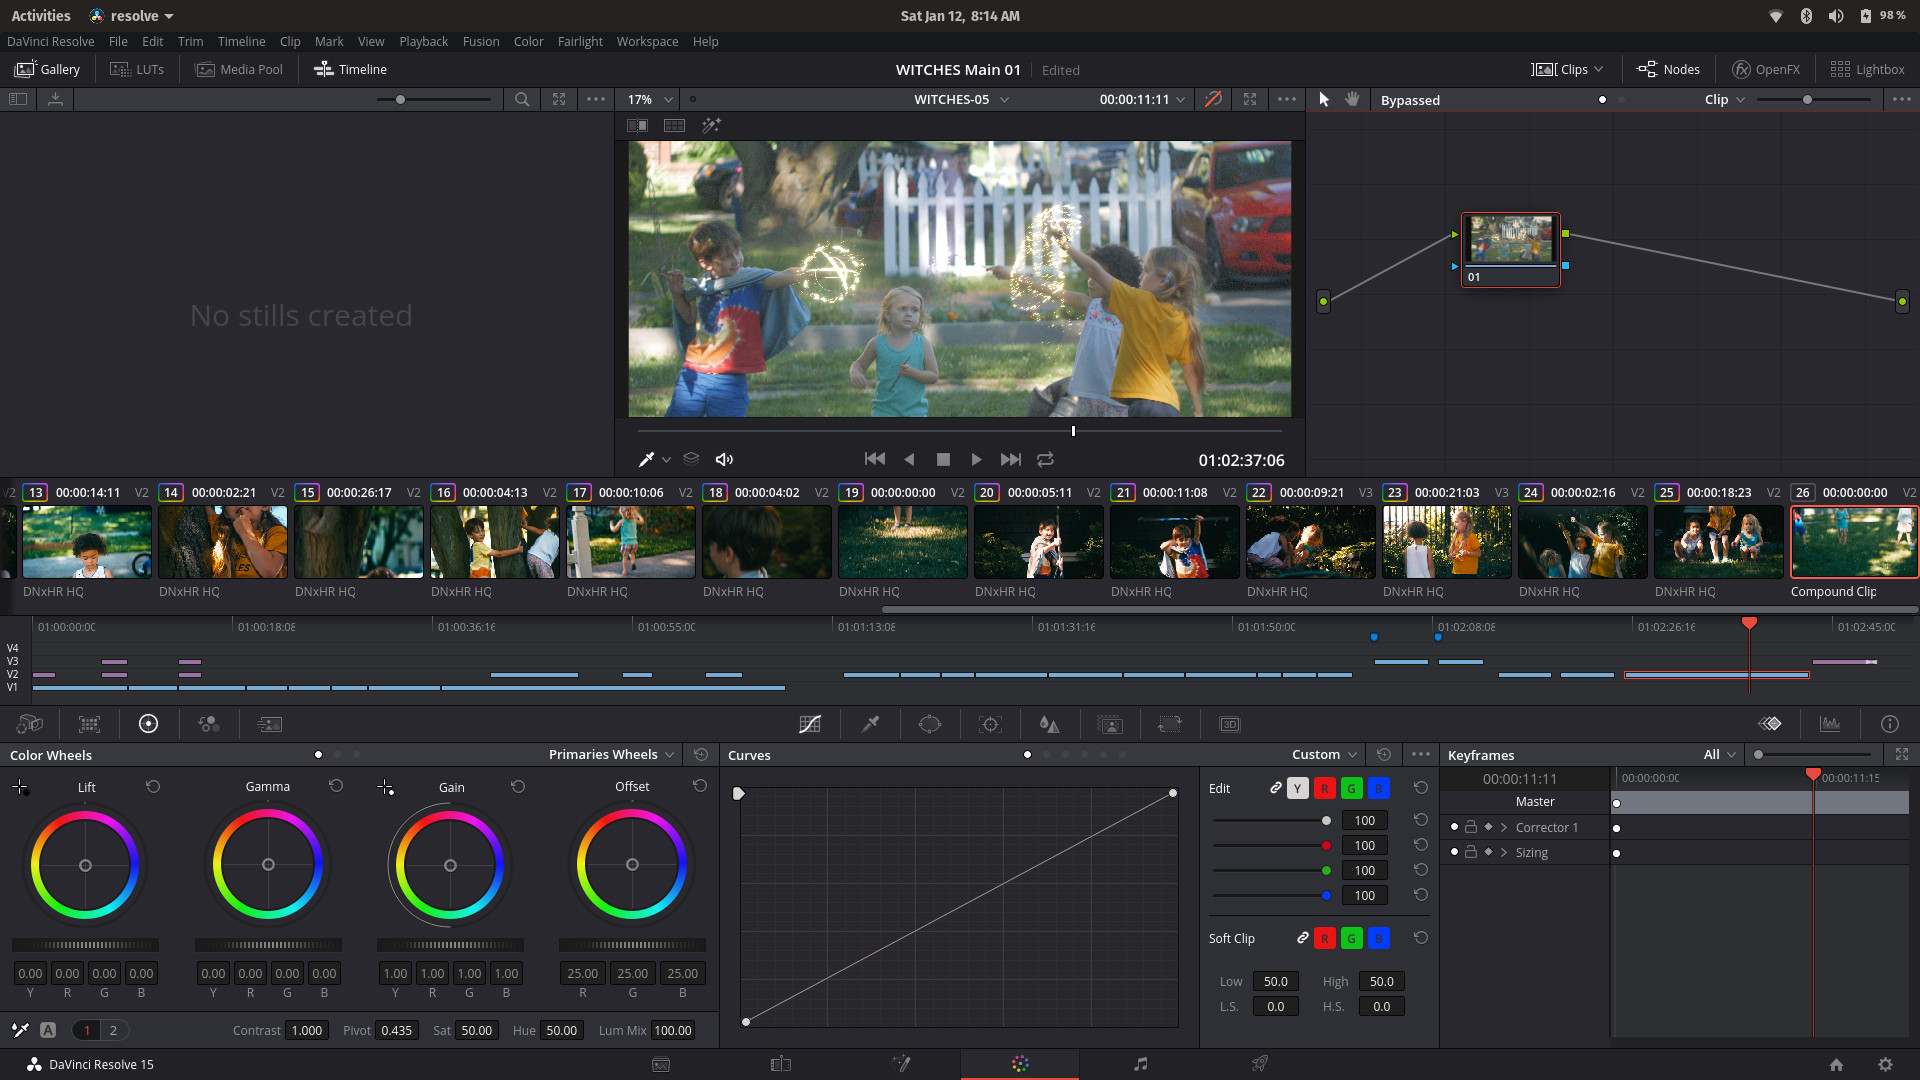
I treated all of the vfx to the ungraded footage and then applied a final grade in DaVinci. Not sure that's how the pros do it, but it felt right :)

NOTE: I'm running on a medium powered Linux laptop. These software and tools, Blender, Natron and Resolve rocked my socks off, with their reliability and robustness. And the GPU rendering capabilities of Cycles--whoa! Add to that the Render Street Service and I was access to things I never thought possible. It was a great humbling experience. Dream Big. Swing Big.

Happy New Year!!

Film Riot & Filmstro (1-minute short contest)

General / 05 December 2018

As children we often hear the lyrics to our favorite music anyway we want to, regardless of the meaning. Hearing a child's interpretation of a popular song, or saying is always magical. In this short, a seasoned wizard learns this lesson while teaching his child her first spell.

We used my old Panasonic g85, an even older minolta 55mm lens, and an older still Schneider Cinelux 2x Anamophic lens. I used a pair of lavalier mics to record onto an old cellphone, with a Takstar directional mic on the camera as a backup. (Thank god I did.)  Edited in Resolve.

I think she may have the actor's bug. Sadly, she has lowly me to act against---tried to keep my input to a minimum!

All music is from Filmstro.com Go there! Now!

Anamorphic Test Uno: Montclair, NJ

Article / 11 July 2018

I work in Montclair, NJ. Its a beautful town with lots of interesting people, and fun stuff to observe :)

I often go out with my camera and photograph the sights. Recently, I've started shooting a lot of video, so I thought I would do both and this is the fruit of that experiment.

Cheating a 2.66 Aspect Ratio.
Lens 55mm Minolta Prime 1.8
Panasonic g85 16/9 sensor with some 4/3 hacks mixed in.
3840x2160 capture converted to 2048 x 1556 scope.

Originally, I was testing the homemade anamorphic filter I made (You can tell in the cruddy bokeh), but then the project evolved to include some VFX work. I started exploring fast, inexpensive methods to generate animatable and rigged models, and landed on adobe Fuse for this test. To keep things in Blender, for next time I think I will instead use the ManuelBastioniLab add-on for Blender---or sculpt something =D

This exercise gave me an opportunity to grapple with composition workflows on a cheap filter before investing in any real glass or 4/3 sensors.
I also learned some additional grading techniques, tracking techniques and motion capture techniques in DaVinci Resolve, and Blender 3D.

This post has a more CGI focused breakdown:

Music: "LITE SPOTS - by Kaytranada"

Sculpt January 2018: unfinished!

General / 02 February 2018

What an awesome ride! Zach and Lukas over at CGChallenge really ought to be commended for starting this awesome tradition. If you had asked me a month ago if I would be open to sculpting anything, I would have laughed in your face. I have always viewed myself more an animator than anything else. I think I will always see things in motion, but it was such a refreshing and exciting treat to challenge myself in this way. I am definitely going to continue and finish out the 31 sculpts, since the time is up, but I have truly learned so much, and I've definitely gotten a bug to do more. I'll have to start getting into the weekly challenges!

I compiled the 20 I managed to sculpt in this post so the team could quickly see what 20 I completed. For larger images and WIPs please check out my Sculpt January 2018 Artstation Album. Until next time!

Using Hair in 3DS Max for Instancing

General / 17 November 2017

3d Studio Max Particle Flow (PFLOW) workflows to instance objects on a surface and drive the density of those objects can be incredibly slow for me. It always happens when i realize that ‘vanilla’ PFlow requires a “speed by surface” and a “lock / bond” two built-in operators that have always been inexplicably slow in my setups. (Full disclosure---this could all be my fault!)

At any rate, in the past I’ve abandoned using normal PFlow and just done matrix transformations and other trigonometric functions, in order to get instanced objects / particles to stick to an emitter object’s surface and align to its normals. I've seen other packages achieve this with seemingly simple steps.

Imagine my surprise when I checked out this tutorial:

Well, I suppose I knew about hair and fur in Max, but I don't think I ever thought about using outside the box in it, like Blender or Maya--where I am constantly reminded that I've just been doing it wrong, haha.  I had a few questions to explore in hair and fur:

  1. —Can you instance custom geometry and drive the density of where that geometry is placed? 
  2. Can you change how much of the grass is visible in viewport vs render?
  3. Can you override material?
  4. Will it react to forces?
  5. Is it reasonably responsive?
  6. Can you cache the data for even faster fidelity?

Unbelievably the answer is yes to each one! `\_(o.0)_/`

Basically follow the tutorial above and replace the object with a custom object here:

Tools Screen Grab

That’s literally it. The variety can come from within the hair and fur itself, also covered in tute.

How about Density maps? Here:

Density Maps Settings

Just drop your map in the blank box to the right of the Density Spinner.

Viewport visibility? Here:

Viewport Visibility

Caching? Here:

Caching Settings

The above image is clipped in the screen grab, but its under the 'dynamics' tab. Also, for something wild check on that live and see the grass react in realtime 0.0. To use the “precomputed” for advanced or heavy sims, that’s where the “stat” files work. Then you set start and end and click ‘run.’

Another case of me just approaching a problem with a jackhammer, when I needed a hammer.